

Customizing shipments by volume, provinces, weight, etc.
WooCommerce has a shipping configuration system that allows us to apply different rates according to different areas, viz: by weight, by volume or even apply discounts or free shipping, if a certain limit is exceeded.
However, it has certain limitations such as, It can not hide the provinces to which we are not going to make shipments for logistical issues. But even, this is not going to be a problem! Here, we will explain, how you can configure WooCommerce shipments thoroughly and, of course, how to get beyond what the powerful programming of this powerful suite allows E-commerce.
- Shipping Zones
- Shipping Classes
- What if I am not going to send it to some areas within the same country?
#1. Shipping Zones
Once WooCommerce is installed and activated, just navigate to the path: Woocommerce -> To just -> Shipping
We will see that the option is selected by default Shipping Zones, which will be the beginning of our configuration:


Here we are going to define ‘many zones’, as we have different geographical rates.
For example:
- A price for local delivery.
- Other for peninsular delivery
- A different price for shipping to the Balearic Islands
- Another one for shipping to Ceuta and Melilla
- And finally, another rate for shipping to the Canary Islands.
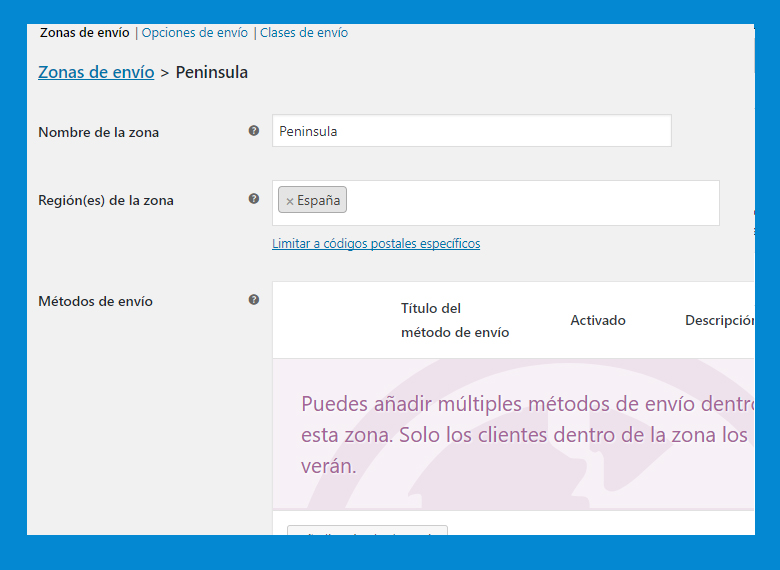
To do this, simply click on Add Shipping Zone and we will write:
- Name of the zone: Internal name that we will use to know how to identify it.
- Region (s) of the area: We can add countries, provinces and / or ranges of postal codes.


Restrictive zones: In the image above we have selected Spain, however, the name of the field is peninsula. What happens to the islands, Ceuta and Melilla?
When we add another second or third zone with a different shipping cost, if these zones are within a larger area, their rate will be applied above the rate of the most global area.
Or put another way, We will have to create the Spain Zone with an X shipping price, and then create the Ceuta and Melilla, Balearic areas and as the third zone, the Canary Islands. Each of them with its corresponding rate. This will cause WooCommerce to apply the specific price to those zones instead of the global price applicable to the Spain Zone.
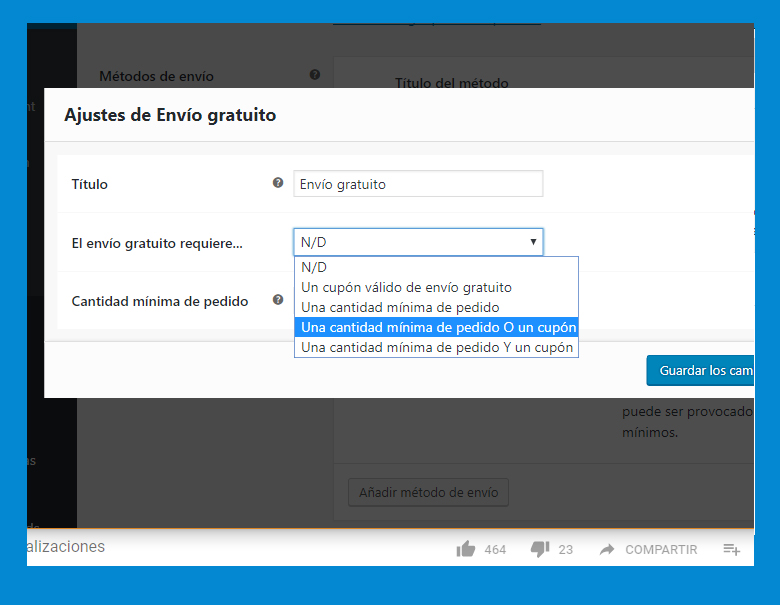
After that click on Add shipping method, and we can choose between:
- Fixed price: The same cost applies throughout the area unless you later create other more restrictive areas.
- Free shipping: For example, if we are defining that it will be free if we exceed a minimum order or if we have a discount coupon.
- Local pickup
- Table Rates: A system to apply a little more complex conditionals.
Naturally, In one area we can add several shipping methods.
To do this, each time we add a shipping method, we can edit it to specify when it is applied:

#2. Shipping Classes
We have already seen that we can vary the price according to different areas or even based on the expense incurred. But, is it the same to send a ring as a piano?
From the ‘Shipping Classes’ option, we can solve this. When we click on this option and click on Add Shipping Class, we can create different types of cases in which our shipment will be expensive.
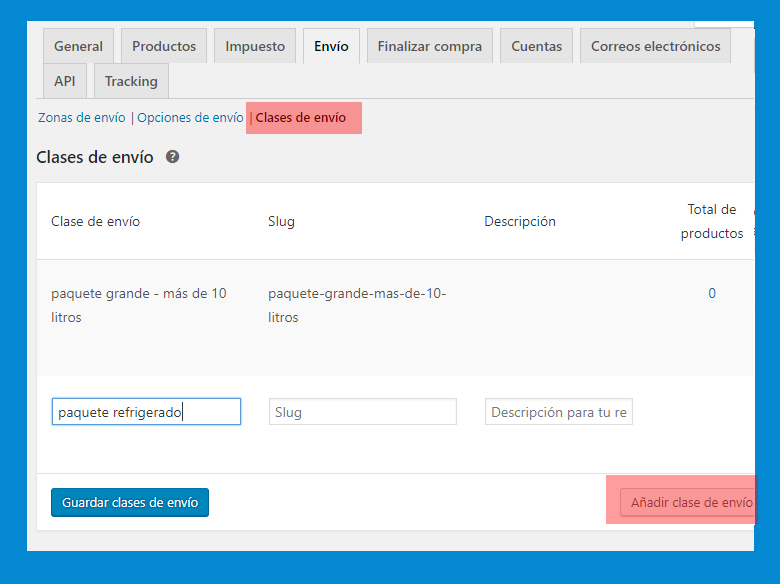

Any ideas:
- Very fragile shipping
- Live content
- Refrigerated content
- Pack of more than 2kgs
- Package of more than 5 liters
Relate shipping classes to shipping zones
After creating the shipping classes, return to point 1 (Shipping Zones), edit them to establish a specific price for each of the new classes we have created.
Match shipping classes with products
And now, this will be the last step we have left.
We are going to ‘products’ option, we look for the ones that we want to assign to the classes created. We edit and we will see that now it appears to us, in the WooCommerce drop-down -> Shipping, the classes created:
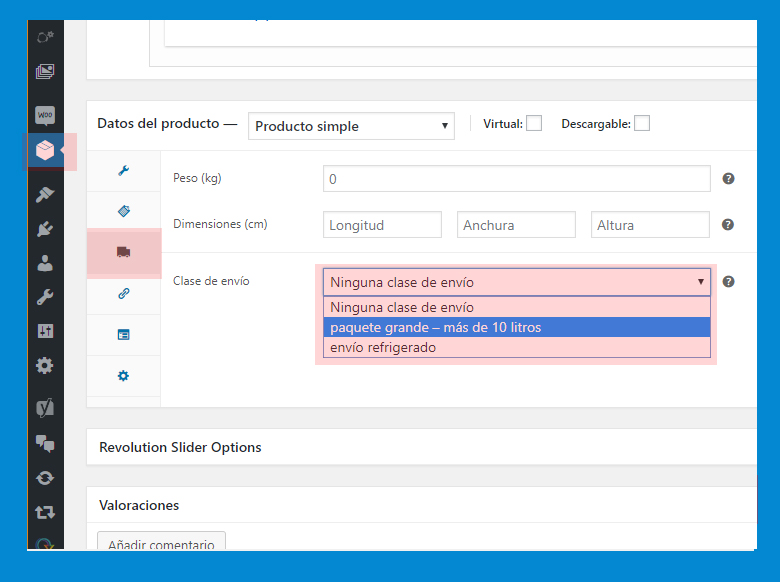

It is not necessary to perform this action product by product. Ideally, we can create classes only for products that really need significantly more expensive shipments than the rest, and leave all others assigned to one flat rate.
#3. What if I am not going to send it to some areas within the same country?
This is where WooCommerce skates.
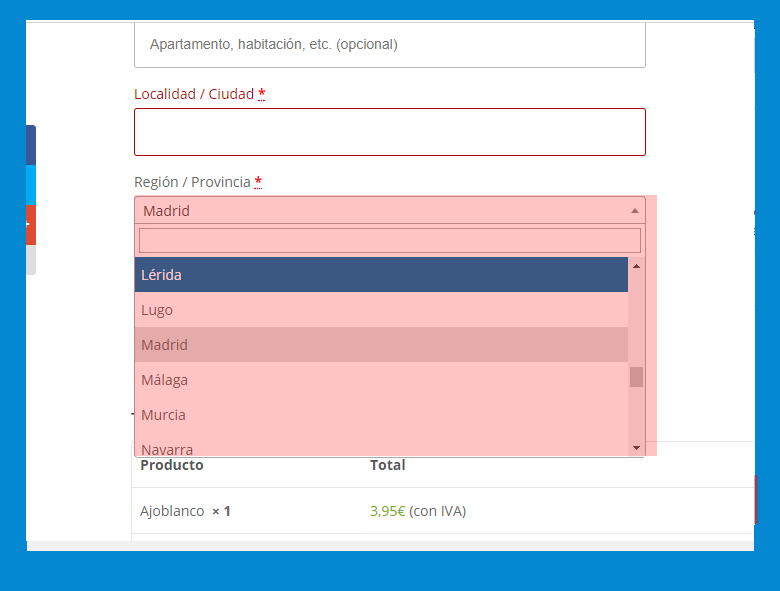
It does not contemplate that, for example, we do not ship to the Canary Islands. Although we create a special area for the Canary Islands to which we do not assign any specific type of shipment, WooCommerce will continue to show the Canary Islands in the list of provinces of the payment form.

How do I do then to exclude certain areas of the checkout form?
We edit the file functions.php, which by default is usually in:
“http://www.our domain.tld/wp-content/themes/ theme_name/functions.php”
And we add a filter listing all the provinces that we don’t want to show:
function limita_envios ($provincias) {
unset ($provincias ('ES') ('TF'));
unset ($provincias ('ES') ('GC'));

return $provincias;
}

add_filter ('woocommerce_states', 'limita_envios');
In this example, Tenerife and Gran Canarias are suppressed.
And if you want, just the opposite, send only to some areas? We use the following code:
function definir_provincias ($provincias) {
$provincias ('ES') = array(
'MU' => 'Murcia',
'A' => 'Alicante',
);
return $provincias;
}
add_filter ('woocommerce_states', 'definir_provincias');
This example will only allow you to select Murcia and Alicante as your destination.
Did you find this entry useful? Do not hesitate to share it!

![[WordPress] Remove the search engine from the Divi menu](https://cdn.ahrefly.net/apkvenue/wp-content/uploads/2020/01/23140618/WordPress-Remove-the-search-engine-from-the-Divi-menu.png "How to Remove the search engine from the Divi menu")

![[WordPress] Add external sources to Slider Revolution](https://cdn.ahrefly.net/apkvenue/wp-content/uploads/2020/01/23140546/WordPress-Add-external-sources-to-Slider-Revolution.jpg "WordPress: How to Add external sources to Slider Revolution")


